Saturday, March 26, 2011

Feel Better Brown Butter Brownies

This past week, I’ve experienced a succession of unfortunate events.  Firstly on Monday, I come into work and wanted to check my financial situation, so I log onto my online banking and see a barrage of fraudulent activity beginning on Friday night and continuing through the weekend.  There are about 12 transactions from FTD.com, dating sights, Skype calls in Luxembourg, online porn site memberships and a ton of other transactions to the tune of over two thousand dollars!  The next few days consisted of my spending a lot of time at the bank disputing charges, signing affidavits and figuring it all out.  On Wednesday night, here in New York we were experiencing awful bizarre weather, it was snowing, sleeting, thundering and lightening and FREEZING.  Anyway, I get off the bus after work, head towards my car and notice my front-end driver’s side tire is totally flat.  A couple of hours later, an AAA call, a donut on my car, I head home soaking wet, freezing and miserable.  My immediate call to action is a hot shower, but I go into my kitchen and find what appears to be HUNDREDS of ants single file coming from a power outlet (from inside the wall!) parading through my kitchen into my cat’s food bowl.  I was repulsed.  Reaching for my vacuum, I took care of those critters like Bill Murray took care of Slimer in Ghostbusters.  Anyway, I had to take Thursday off to take care of my finances, car, the ANTS and my taxes, which I did.   By Friday, I was defeated and done with the week.  I head to my personal training session at my gym at around noon, ready to get my ass kicked AND relieve some of the stress I had accrued from my week from hell.   The combination of my trainer NOT listening to me (Uh, I usually lift HALF of that weight) and my obviously low blood sugar had me wiping out at the gym, embarrassingly.  I awoke to an all-over body sweat, people in my face urging me to “drink water!” asking “are you okay?”  Eh….

So yeah, I needed something to make me feel better.  That something is chocolate or to be more specific, one of the best brownie recipes I’ve ever tried.  A foolproof delicious, moist, chocolaty, bit of fudgy perfection with walnuts.   The first time I tried this recipe I wondered to myself “why the HELL do people use boxed brownies?”  They are that EASY and the result will make you forget all about those notions of what you think “good brownies” should taste like.  One of the main ingredients is browned butter, which imparts a deep, nutty flavor.  You bake them in your 8x8x2 dish that you line in foil, which allows you to lift the brownies out to let them cool leaving you with no extra clean up!  Try these out, you won’t be disappointed and I can almost promise you, that you won’t go back to boxed after this!

Browned Butter Brownies with Walnuts
Prep Time: 20 Minutes
Total Time:  1 Hour

Ingredients
  •         Nonstick vegetable oil spray
  •        10 tablespoons (1 1/4 sticks) unsalted butter, cut into 1-inch pieces
  •     1 1/4 cups sugar
  •     3/4 cup natural unsweetened cocoa powder (spooned into cup to     measure, then leveled)
  •     1 teaspoon vanilla extract
  •     2 large eggs, chilled
  •     1/3 cup plus 1 tablespoon unbleached all purpose flour
  •     1 cup walnut pieces

Preparation
Position rack in bottom third of oven; preheat to 325°F. Line 8x8x2-inch metal baking pan with foil, pressing foil firmly against pan sides and leaving 2-inch overhang. Coat foil with nonstick spray. 


Melt butter in medium saucepan over medium heat. Continue cooking until butter stops foaming and browned bits form at bottom of pan, stirring often, about 5 minutes. 


Remove from heat; immediately add sugar, cocoa, 2 teaspoons water, vanilla, and 1/4 teaspoon (generous) salt. Stir to blend. Let cool 5 minutes (mixture will still be hot). Add eggs to hot mixture 1 at a time, beating vigorously to blend after each addition. When mixture looks thick and shiny, add flour and stir until blended. Beat vigorously 60 strokes. Stir in nuts. Transfer batter to prepared pan.


Bake brownies until toothpick inserted into center comes out almost clean (with a few moist crumbs attached), about 25 minutes. Cool in pan on rack. Using foil overhang, lift brownies from pan. Cut into 4 strips. Cut each strip crosswise into 4 brownies.


Recipe courtesy of Bon Appétit

Wednesday, March 16, 2011

A Culinary Journey Through Staten Island’s North Shore


Last weekend, bored out of my mind and looking for something new to do, I decided that I needed to explore within my own backyard so to speak.  There is a stretch of area on Staten Island from Bay Street up through Victory Blvd that while looks interesting I’ve filed away into my subconscious being that I pass it every single day.   So, I got in my car and made the, er, FIVE minute ride down Victory Blvd.  My first stop was the Grocery Lanka (353 Victory Blvd) down just before Cebra/Castleton.  


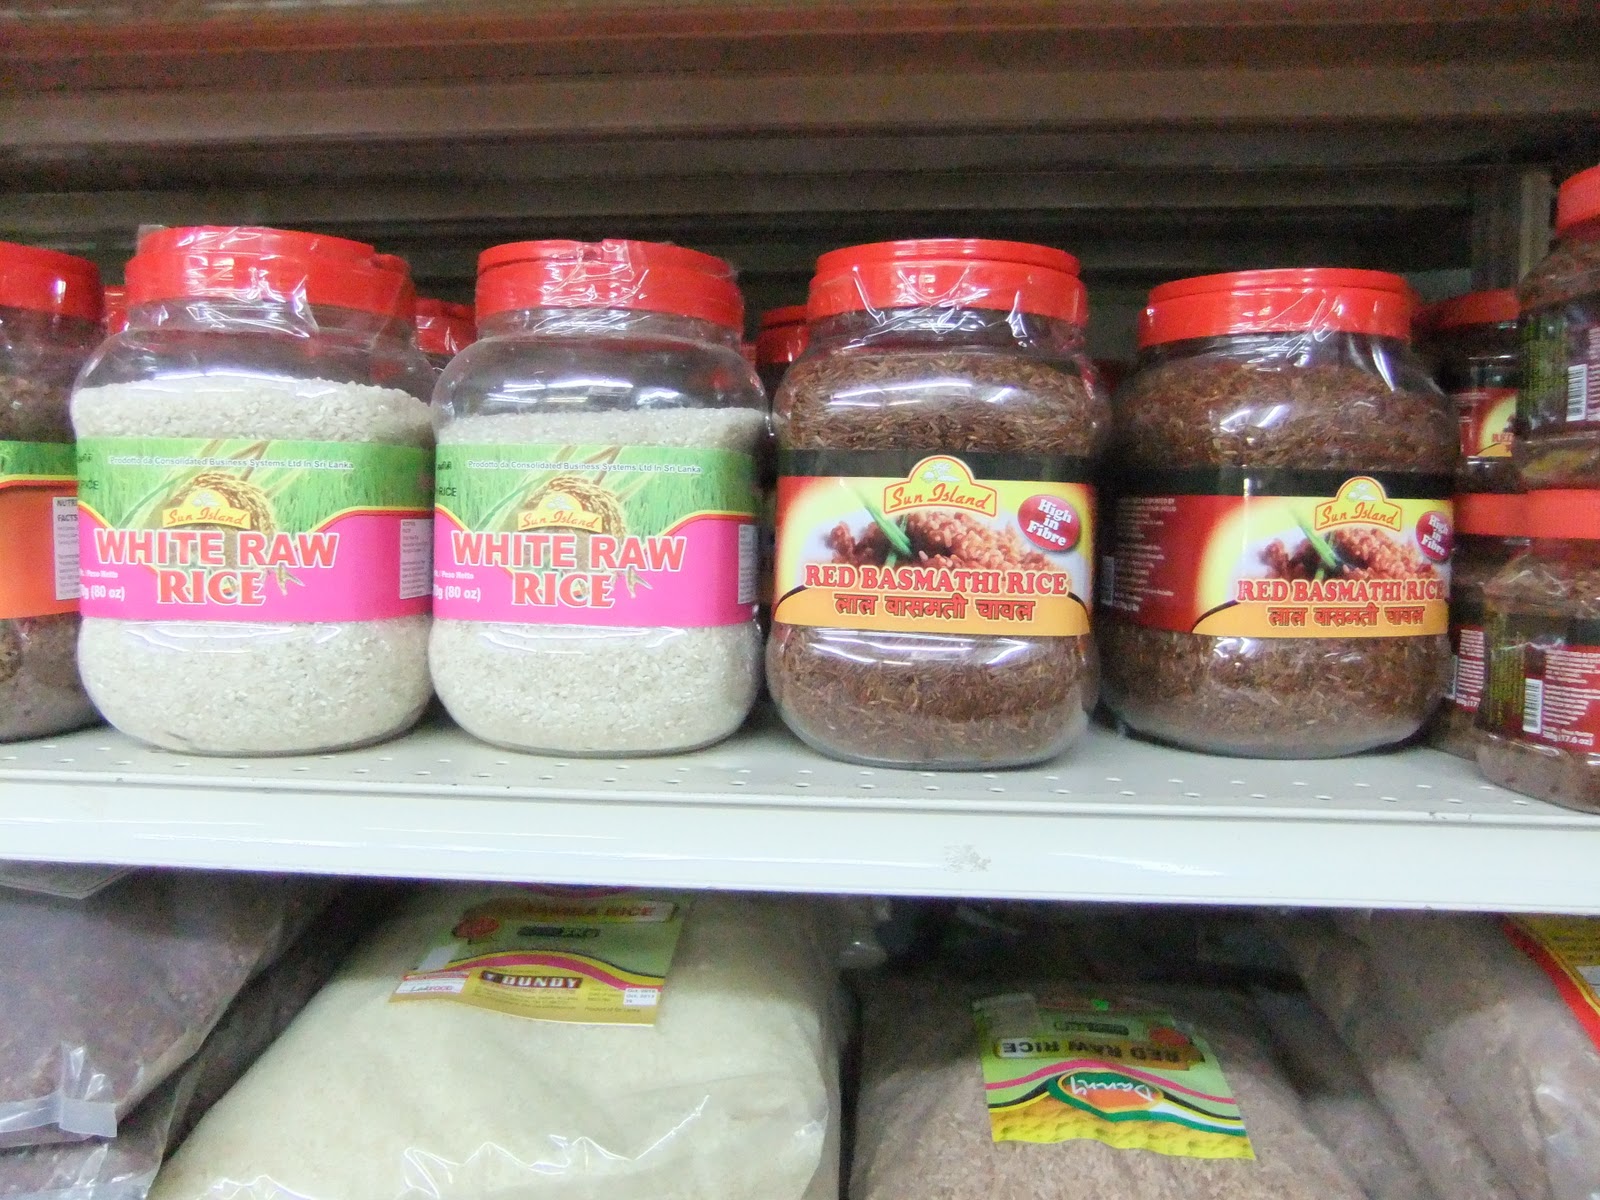
This store looks completely non-descript from the outside, like any other bodega but is actually a treasure trove of Indian/Sri Lanken & Asian spices.  I’ve recently started experimenting with Indian cuisine and LITERALLY had just ordered Garam Masala and a few other items online, which cost me a good amount of money.  So, you can understand my surprise when I walked into the Grocery Lanka!  The place is tiny but PACKED with the biggest selection of spices and cooking ingredients. 


A huge variety of roasted curries, all sorts of different lentils, flours, rice, spices and so much more all inside this tiny grocery store!  In the back I noticed one of the owners sorting through a huge box of dried green leafy things, which I thought was Fenugreek leaves, but when I inquired, he told me they roasted their own curry and shipped it worldwide!  I picked up Gram flour (chickpea) for some Paneer Pakora I wanted to make,  green cardamom for $1.99, which retails for $15 at the supermarket, Garam Masala, some dried roasted curry powders, garlic & ginger paste, Tumeric & basmati rice for about $15.  Leaving with my armful of groceries and the owner scratching his head at me asking “Do you cook a lot of spicy food?” YES, yes I do. 


I was thrilled with my bounty and continued down the road.  My next stop was a little further down, a Mexican grocery store called Frutas y Abarrotes Mexico Deli & Grocery (54-A Victory Blvd).  In this instance, you would likely expect a standard Mexican fruit & deli, right?  This place IS pretty standard but does stock a good variety of dried chiles, tamale wrappers, spices and here’s the kicker for me, HUGE pieces of CHICHARONNES, which if you don’t know are pork rinds.  The chicharonnes here are lightly salted and sold by the pound in huge plastic bags.  I realize these might not be everybody’s cup of tea, but I happen to really love chicharonnes.  I left with a half pound, which were fresh and delicious and some dried ancho and guajillo chiles which I plan on using for a chocolate mole sauce.


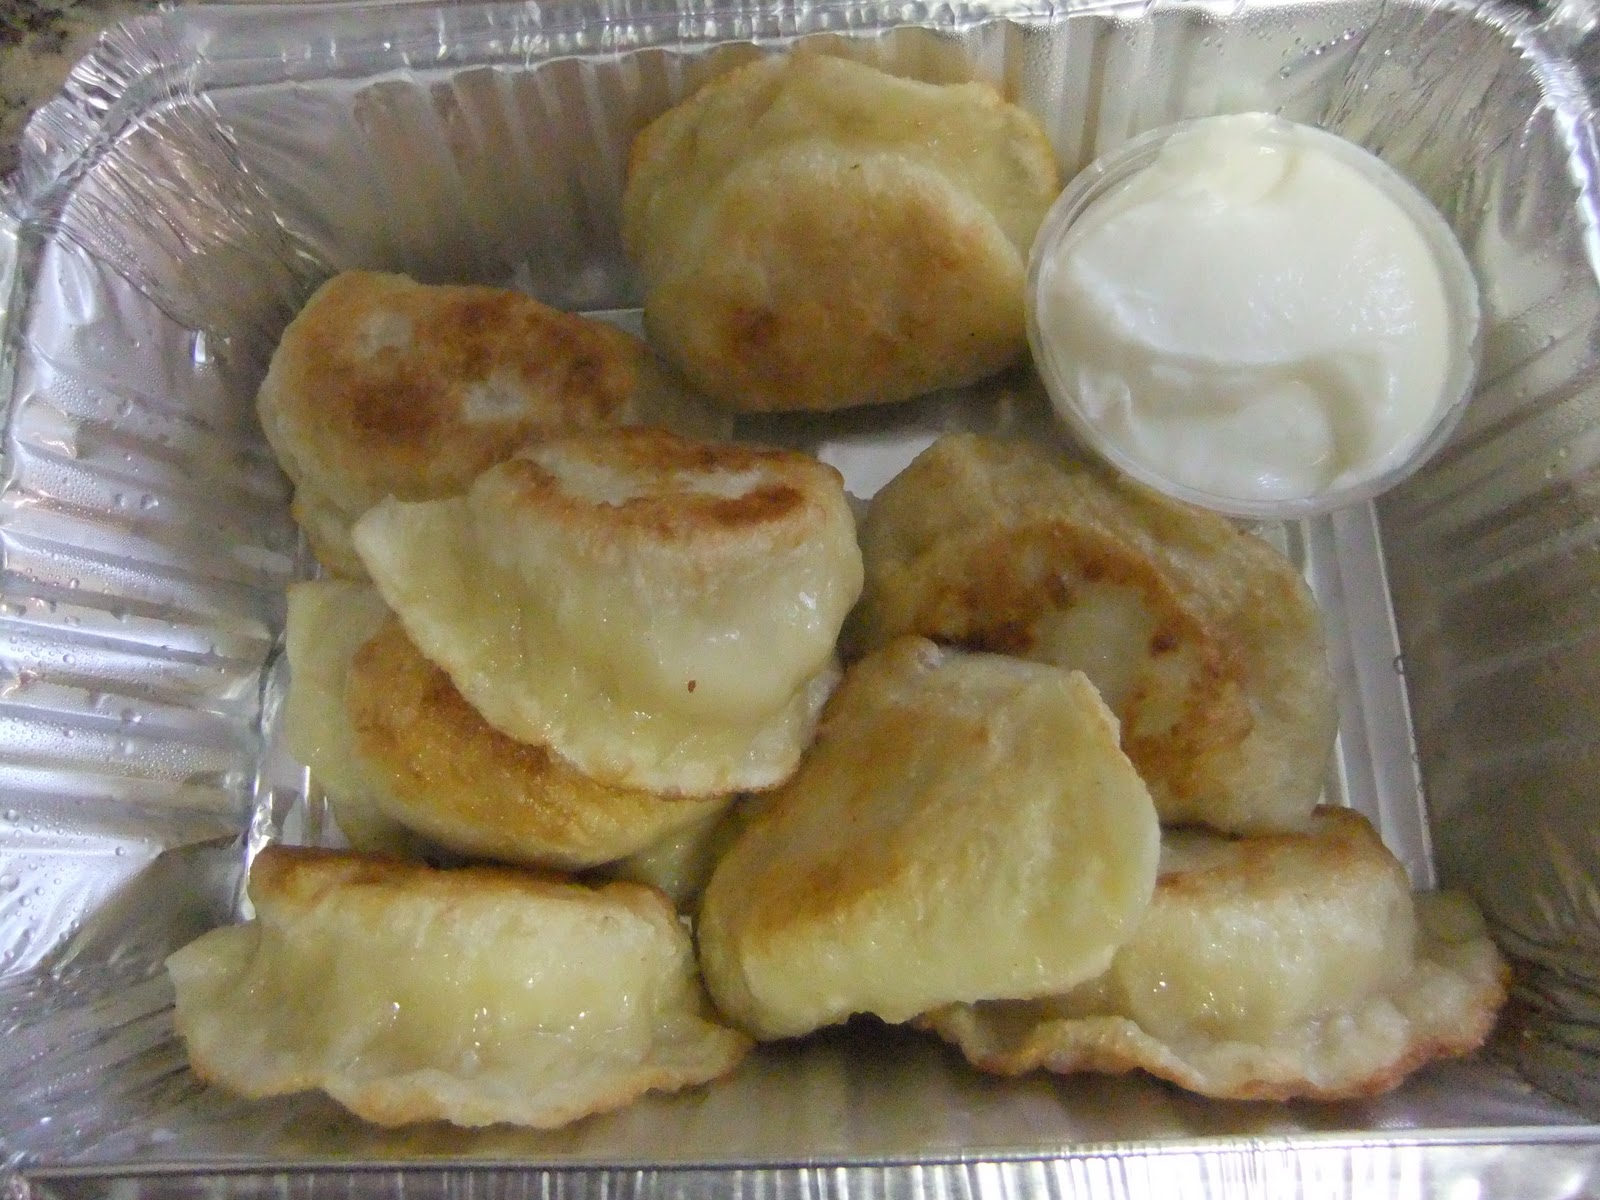
I was about to leave the area and was heading back to my car when I noticed ONE more place just across the street, The Polish Place (19 Corson Avenue).   The Polish Place was a restaurant on one side combined with a Polish deli attached, presumably operated by the same owner.   I quickly looked it up on UrbanSpoon and surprisingly, The Polish Place had ALL excellent user reviews.  I headed into the deli, since I wasn’t looking for a sitdown experience and wanted to check it out.  In the back of the store was a deli window where you can order all kinds of hot Polish food to go!  They had potato pancakes, a huge
variety of pierogies, blintzes and borscht & of course kielbasa sandwiches. I opted for a   kielbasa sandwich and potato pierogies which were satisfying, excellent and CHEAP!


The people working there were warm & friendly and quick to answer all my questions & provide me with suggestions.  After declaring my love for Zubrowka vodka one of the ladies recommended a Zubrowka filled chocolate candy.  The candies were boozy and reminded me of those chocolate liquor bottles you used to get at your relatives homes during the holidays!  I left The Polish Place amply filled and slightly tipsy. 


My culinary journey concluded at Everything Goes Café, which while not as ethnically diverse as my previous stops, allowed me to load up on a ton of vintage cookbooks.  I left with 5 books totaling about $20.  It was a good day & it reminded me that a culinary adventure need not be any further than within your own stomping grounds.  I’m excited to get cooking with my new spices and culinary resources!  

Monday, March 7, 2011

Laissez Les Bon Temps Roulez!


Mardi Gras is right around the corner and what better way to pay homage to the great city of New Orleans than with a New Orleans themed posting.  I’ll come clean, I’ve actually never been to actual Mardi Gras.  The idea of New Orleans filled with THAT many people just boggles my mind.  I mean, we’re talking 500,000 people PLUS, PLUS.  Bourbon Street is not even THAT long of a street.  The equivalent would be dropping myself into the middle of Times Square on New Year’s Eve and that idea just doesn’t appeal to me.  BUT, New Orleans during Halloween is just lovely.  The number of people that attend is significantly less.  You get the parade and the fun and the beads up close, right on the route lines without having to elbow your way through.  The weather is mild and crisp sans the humidity & mosquitoes (though they do sometimes stick around!)  

Anyway, New Orleans is hands down a culinary & spirits extravaganza.  It’s already been months since I’ve been there and the flavors I experienced there are still fresh in my mind.  The hotel I stayed in during my week-long visit is located in the Historic Garden District, a few St. Charles Avenue trolley stops away in a more quiet, traditional area.  In the Garden District is where you will find all of those grand, amazing historical homes with elaborate wrought iron fences and balconies.  It’s where Lafayette Cemetery #1 is located and across the street is the famed Commander’s Palace.  In operation since 1880, Commander’s Palace offers traditional southern & Creole food served in a setting that is also traditionally Southern.  


The waiters are dressed to the nines, ever attentive and aim to please. Additionally, and more importantly, Commander’s Palace serves 25 CENT martinis during the week! YES, 25 CENTS!  But, wanting to get the full experience that Commander’s has to offer, I took the liberty of booking myself for the Sunday Jazz Brunch.  YOU will need to make a reservation if you choose to go there on a Sunday. I wasn’t quite sure what to expect of the food to be honest, but nothing prepared myself for the food that I ate that day.  My brunch experience set the bar HIGH for the rest of the week. The food was DELECTABLE.  I opted for the Price Fixe menu that included three courses and a Bloody Mary served from an ice block.  The first course, a Gumbo YaYa included whiskey barrel chicken simmered in a rich poultry stock, RICH was not the word. The andouille sausage was house made and also amazing. The second dish, Eggs Couchon de Lait featured perfectly poached eggs served over rosemary biscuits with a smokey braised pork debris & bourbon bacon fat hollandaise. You don’t understand how PERFECT this dish was.  It was smoky, savory, decadent! This dish was one of the BEST dishes I’ve ever eaten in my life. 


Forget Daniel Boulud, forget Thomas Keller & Colicchio—I devoured every last bit, demanding that the waiter go back to the kitchen and tell the guy at the sauce station that I wanted to bring a gallon of this sauce home! Okay, I just told him to send my compliments, but you get the drift.  When I thought I couldn’t eat anymore, the dessert came out, Creole Bread Pudding Souffle. The waiter comes over, breaks the soufflé and then pours a warm whiskey cream sauce onto it.  The experience was pure heaven.  


The jazz band took my A-Train request and I never wanted to leave Commander’s Palace.  We loosened our belt buckles and decided a walk was in order to digest what we had just destroyed.

The next day we took a walking tour of Lafayette Cemetery #1, organized and led by a member of the Save Our Cemeteries Organization a non-for profit dedicated to the preservation and restoration of the historic cemeteries in Louisiana.  The tour was $10 a person with proceeds benefitting the organization. The tour guide was a true LA native and gave us a history lesson like no other touching on everything from the origin of the Po’ Boy to an education on the public use aspect of Louisiana cemeteries (the above ground tombs are reused when the bodies decompose!) The cemetery is beautiful and memorable and is JUST like every movie you might have seen it in, Interview With a Vampire & Easy Rider included.


Speaking of Po’boys…we ate A LOT of them. We had shrimp po’boys, oyster po’boys, steak po’boys. By the third day of the week we were ready to detox from all the fried food, but we ate on!

On the opposite end of the spectrum of the Southern Traditionalism found at Commander’s Palace, was a casual, comfy, albeit amazing dining option down in Bywater area (near the 9th ward) called Bacchanal Wine. The front of the Bacchanal operates as a wine retail shop stocked with an impressive selection. Towards the back of Bacchanal, past the cheese station (more on that later) is a huge backyard where their chef, Joaquin Rodas cooks up amazing culinary delights in his outdoor cooking station & grill area.  Ok, you’re thinking grilled meats, right? So was I!  What I got instead was a braised lamb shank coated in Moroccan spices served over a bed of yellow lentils. The lamb so tender it must have been braised for hours! A creamy sweet potato soup punctuated with autumnal flavors- clove, cinnamon, perhaps a bit of cumin.  The wine never stopped flowing, since a bottle is a walk to the front of the store, where the employees are happy to recommend something to you based on what you might be eating.  You can also pick up a cheese plate based on your wine selections by the deli counter.   Also, the music never stopped playing, because did I mention, there was a live jazz band on a stage in the backyard as well? If I lived in New Orleans, I would surely call Bacchanal my second home.  It was comfortable, fun, the food made at a standard you find in a fine restaurant and the entertainment was excellent.  We left New Orleans properly after that night, with a hangover!! But it was worth it.  AND yes, we did all the requisite Café du Monde, Antoine’s, Pat O’Brien’s, Preservation Hall and more.   I get why people fall in love with New Orleans, it’s easy just like the nickname so apropos, the Big Easy.


Monday, February 28, 2011

Lemon Chocolate Milk Vodka Infusion


I recently was reading though some of my favorite blogs and came across an interesting recipe from theKitchn.  The editors there were working their way through a cookbook called The New Portuguese Table by David Leite which featured a recipe for a delicious Milk Vodka Liqueur.  The documented process both intrigued and fascinated me.  As someone who enjoys making her own vodka infusions as well as her own vanilla extract (vanilla bean & vodka)- it appealed to me as something I immediately wanted to try.  The recipe is simple, equal parts whole milk, sugar, vodka plus flavor additions (orange, chocolate, lemon, lime etc.) and the process looks disgusting to put it bluntly.  You have to let the whole mix sit, coagulating for ten days in a dark, cool place. The result is an astonishing beautiful, clear liqueur that is lemony, milky, with a syrupy feeling in the mouth and all-around amazing.  The finished product is perfect sipped straight, and is amazing, I’m sure, mixed with similar liquors.  It’s almost like a creamy limocello, but sweeter, not as furniture polish-like.  You can make this in small batches or larger batches, always keeping the portions equal.  I started with a few variations- lemon first and then chocolate (85% cocoa) & orange.  I struggled a bit through the filtering process but found the best option eventually, which I will share with you.  Also, do yourself a favor and get over to Michael’s to pick up some cheap mason jars, which they have in different sizes that are perfect for gifting.  Make sure your jars are absolutely clean before beginning this process. I put mine through the dishwasher first.

Makes about 1 quart of liqueur:
  • 2 cups vodka

  • 2 cups whole or 2% milk

  • 2 cups granulated sugar
  • ½ of a lemon, rind and all!

 For the chocolate liqueur:
  • 1/4 of a an orange, rind and all
  • 2 ounces of dark chocolate, Shredded

Add all liquid ingredients into your jar first, then add the lemon last wedging it in. Close your jar tightly and shake vigorously to allow the sugar to dissolve.  Leave your jar in a cool, dark place for ten days, giving it a shake every couple of days or so. 


After your ten days of infusion, it’s time to strain your liqueur. 


I found the best option for this is to take a coffee filter & stick it into another vessel forming a pouch and securing the sides with tape. The tape ensures that your milk solids won’t mix with your finished result.  Pour a little through your strainer, giving it a bit of help with butter knife or spoon when it seems to slow down a little.  Change the filter if the solids seem to be REALLY clogging up.  You can strain it 2x if necessary- take cues from the liquor, if it looks cloudy, strain it again.  The finished result can be stored for months.


We love this after dinner, almost like a dessert liqueur.  I tried two variations of this recipe, but the possibilities seem endless.  I’m thinking some raspberries or strawberries would be lovely, as would some chai tea infusions.  Always remember that with cooking and anything else, garbage in equals garbage out, so always use quality raw ingredients, like a premium vodka or Lindt 85% cocoa to ensure your result will be great.

Don’t be afraid to drink the finished result. I know the process seems odd, but the result is delicious.  My parents loved it and so did everyone else I forced to try it.


Monday, February 21, 2011

Chorizo con Huevos


Since I’m on the Spanish tip right now, I figure why not continue with breakfast foods that are my favorite, that I’ve eaten for years that I think you might like as well!  Chorizo con huevos, is one of those favorites.  It’s a traditional Spanish breakfast dish that is typically made and served in a small (9.5 inch) clay cazuela dish that is handmade and glazed, that you are supposed to soak in water for a few hours prior to first use.  You can get them here.


My mother, knowing that it is one of my favorite meals, brought me two cazuela dishes from Spain and gifted me with them when I first moved out of my house.  Ever since she taught me how to make chorizo con huevos, it has continued to be a favorite of mine.  It is easy to make, satisfying and also helpful for a hangover.  The chorizo that I use for this dish is typically the dry cured kind that Goya makes. They come vacuum sealed in packages of two or four.  Back in the day, my parents decided to make their own chorizo.  I would go downstairs in the basement and there would be hanging chorizo everywhere, dry curing.  You can imagine what it smelled like down there- a combination of saffron and dried meat- which wasn’t the most savory. Thankfully, they’ve retired their at-home chorizo making.


If you happen to have some marinara or jarred spaghetti sauce in your house, this works just fine. This dish is pretty low maintenance, so just use what you have! The below uses the most basic tomato sauce as a base, which if this is what I’m using, I like to add some spices to for a better flavor.

Ingredients

  •         Tomato sauce (8oz can)
  •         1 egg
  •         1 chorizo, sliced into rounds
  •         ¼ teaspoon of garlic powder
  •         ¼ teaspoon of oregano
  •         Salt & pepper to taste.


Directions

Put your cazuela dish onto your burner and turn the heat on to medium. You don’t need oil here because the chorizo will release a lot of oil when you cook it.  Add the chorizo and sear it on both sides. I happen to like my chorizo with a little bit of crunch, but you can cook it however you see fit.  


Crack your egg directly into the middle of the cazuela dish and then turn your heat to low.  The reason why you do this, is because it WILL splash as you cook it. 


As the egg continues to cook, spoon your desired amount of tomato sauce around the egg. For me, it’s about 4oz of tomato sauce.  Sprinkle with the garlic powder, the oregano, salt & pepper.  


Turn the heat off and allow your egg to continue to cook up.  Now, I happen to like my egg cooked on the well side, so I take my cazuela dish and pop it in the microwave for 45 seconds to really set the egg. If you take this step, be sure to tent the dish with a paper towel, so you don’t make a mess in your microwave, also pierce the egg with your fork prior so that it doesn’t explode in there! Serve with toast and enjoy a traditional Spanish breakfast!


Wednesday, February 16, 2011

Mmmm Churros


I’m sure you’ve heard of churros and I’m sure the majority of you have eaten churros.  One memory I have of churros comes from when I was little and my mom would drag me along to Kmart.  At the sad snack counter they had one of those standing heat lamp devices that rotated and had churros hanging from little hooks.  They always looked like they were coated in sugar and were all uniform in length and size.  When I would ask my mom if I could get one (they were usually like 3 for a $1) she always said “no” and that they “weren’t good”.  My mom had a bias when it came to churros and for good reason.  My OTHER memory of churros comes from having spent many summers in Spain for many years growing up.  We would often visit my family in Madrid for 3-4 weeks in August every year.   Throughout Madrid in all the bakeries and in all the tapas bars in the morning you could purchase freshly made churros.  I was obsessed with these churros and EVERY morning would ask my grandmother for “churros con café”, yes as a child I wanted coffee.  I was drinking coffee at about 7 but I digress.   So every morning my family would go purchase a ton of churros, they would come in a brown paper bag and I would eat them with my café out on the terrace of my grandmother’s apartment.  They weren’t the churros that were covered in cinnamon and sugar and they weren’t even stick shaped. These came in uniform loop shapes without any kind of sugary addition or flavoring, yet they were utterly light and delicious.  I rarely have the opportunity to have these Spanish style churros anymore, so to my surprise when I visited my mom a few weekends ago and she asked “do you want to make churros?” of course I said YES.

My mom happens to have a churrero, which is a device similar to a pastry or icing tube where you spoon the mixture into a tube and crank down on the opposite end to push the mixture through a star shaped tip.  My mother claims that it’s a long standing tradition to use a device that has no metal, so hers is made of plastic.  You can find one here.  My mother says it’s crucial to use a wooden spoon to cut the piped pieces into the oil.  Despite my researching why this is the case, I’ve haven’t found anything substantial that lends to this school of thought, but I will take her word for it and continue the tradition.  I’m sure you can use a pastry bag with a plain piping nozzle as well!  You have to see the efficiency of the way churros are made locally- the loops are so perfect and uniform.  I have no such skill, so my churros turned out slightly more “rustic” if you will.

Ingredients
Makes 12-15 churros

To make the Batter:

1 ¾ cups of all purpose flour
¼  Teaspoon of salt
2 Tbsp of confectioners sugar
1 cup of water
4 Tbsp of olive oil
1 egg beaten
More confectioners sugar or cinnamon if you want to “dust” your churros
Oil, for deep frying

Sift the flour, salt and sugar in a bowl.  Put the water and oil into a pan and bring to a boil.  Slowly add the flour mixture into the boiling water/oil and mix with a wooden spoon until it forms a thick paste.  Turn off the heat and allow the mixture to cool for 5-10 minutes.  After the mixture has cooled, add the egg and mix until smooth. 

Spoon the dough mixture into your pastry bag (use a ½ plain piping nozzle) or churrero and pipe it directly into your heated oil (which should be about 300 degrees) making loops or “s” shapes.  This takes practice- you can do as I do and just go with the generic shape flow, using a knife or wooden spoon to cut the dough to your desired length.  Fry for about 2 minutes or until golden brown.  Drain the churros on paper towels and give a light dusting of confectioners sugar or cinnamon while still hot. Serve immediately…hopefully with café or chocolate! 


Monday, February 14, 2011

Baja Fresh

Have you ever had a fish taco? Yeah, yeah let’s try to ignore the obvious joke insertion here. I wanted to make those jokes too prior to having one.  Here in New York there is actually a shortage of really good, fresh baja style tacos in general. The kind of Mexican tacos you typically find here come in a crunchy corn shell and have some kind of super dressed meat or chicken, heavy on the cheese and sour cream. Here in New York, fish tacos are a rare occurence.

So what IS Baja Style?  Baja style is characterized by fresh, healthy, light ingredients with a heavy emphasis on fish, fresh salsas and salad- it’s kind of a mix of California style meets Mexico. I for one really enjoy Baja style Mexican food because it doesn’t weigh in your stomach like you ate a lead, cheese covered brick. 

SO, as of right now, the LAST time I ate an excellent fish taco was last spring, right around April or May when I was down in South Carolina for my friend’s wedding.  Part of our celebrations included a mandatory trip to Taco Boy a great Baja style Mexican restaurant right near Foley Beach- it’s so quintessentially beach bum, one of those places you can go to in your flip flops with sand still in-between your toes.  The fish taco they had there was damn near perfect.  The fish so lightly battered placed on just the right amount of shredded cabbage, a few slices of radish, a wedge of lime and a light, lovely ancho chili yogurt dressing all for a mere $3.95 each! I ate about four of them, washing it all down with a margarita on the rocks. This taco was the type of food that you think about for months after you eat it.  So, from the second after I ate one, my quest to recreate the experience commenced.  Since I knew that finding a comparable fish taco in New York was not going to happen, my only option WAS to recreate. The below comes as close as I can get and it’s pretty damn close.  I like to use cod because it holds up well to frying.  I also pair this and ANY Mexican food I make with fresh pico de gallo. Go get yourself some Coronas and enjoy!


Ingredients
Serves 6-8
            1 cup all-purpose flour
            2 tablespoons cornstarch
            1 teaspoon baking powder
            1/2 teaspoon salt
            1 egg
            1 cup beer
             
For the Sauce:

            1/2 cup plain yogurt
            1/2 cup mayonnaise
            1 lime, juiced
            1 jalapeno pepper, minced
            1 teaspoon minced capers
            1/2 teaspoon dried oregano
            1/2 teaspoon ground cumin
            1/2 teaspoon dried dill weed
            1 teaspoon ground cayenne pepper
             
            1 quart oil for frying
            1 pound cod fillets, cut into 2 to 3 ounce portions
            1 (12 ounce) package flour tortillas
            1/2 medium head cabbage, (white or purple) shredded


For the Batter:
      To make beer batter: In a large bowl, combine flour, cornstarch, baking  powder, and salt. Blend egg and beer, then quickly stir into the flour  mixture (don't worry about a few lumps).
                    
   To make white sauce:

In a medium bowl, mix together yogurt and mayonnaise. Gradually stir in fresh lime juice until consistency is slightly runny. Season with jalapeno, capers, oregano, cumin, dill, and cayenne.

Heat oil in deep-fryer to 375 degrees.
                    
Dust fish pieces lightly with flour. Dip into beer batter, and fry until crisp and golden brown. Drain on paper towels. Warm your tortillas. I like to do this by placing the in-between paper towels and microwave them for up to 1 minute. To serve, place fried fish in a tortilla, and top with shredded cabbage, pico de gallo and white sauce.

Fresh Pico de Gallo:

            1 medium tomato, diced
            1 onion, finely chopped
            Juice of 1 lime                       
                        1/2 fresh jalapeno pepper, seeded and chopped
            2 tablespoons of fresh cilantro, finely chopped
            1 green onion, finely chopped
            1 garlic clove, chopped
            1/8 teaspoon Kosher salt
            1/8 teaspoon pepper

Directions
In a medium bowl, combine tomato, onion, lime juice, garlic, jalapeno pepper, cilantro and green onion. Season with salt and pepper. Stir until evenly distributed. Refrigerate for 30 minutes.